Filling the raised bed:
this is how you proceed
Most raised beds are built in the spring. This can be quite stressful, because you have to prepare the ground, put up the raised bed and finally fill it. And this at a time when everything is sprouting and thriving all around and you need many more hands for your garden.
Autumn is the ideal time for assembly and filling
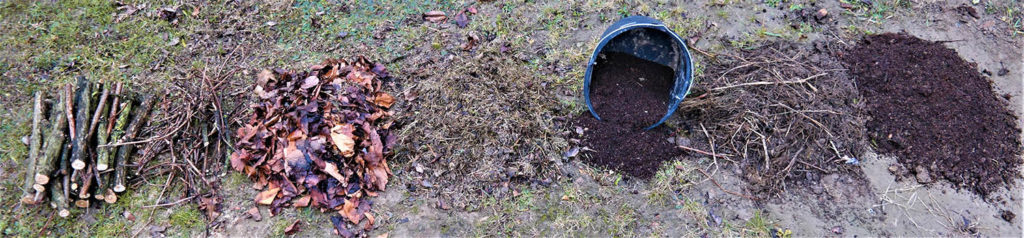
And then there is the matter of the filling material. Cut branches and twigs of shrubs and hedges pile up in the fall, and the leaves rustle on the ground in November.
So there’s a lot to be said for planting your raised bed in the fall. You have less stress, enough material for filling and can sow and cultivate immediately in spring.
The right material for filling
A raised bed is more than a big box that you simply fill with soil. Because the secret to the huge harvest from the raised bed lies in its filling.
This goes into the raised bed:
Tree and shrub pruning from deciduous hedges and trees.
Perennial debris such as stems, leaves and cut flowers, debris from vegetable beds (e.g., outer lettuce leaves, stems, roots, etc.)
Seedless green parts of weeds
grass, lawn clippings
leaves of most deciduous trees
Compost: half rotted and fully matured
Ev. animal manure, e.g. from horses or cattle
Organic soil, humus soil
This is NOT allowed in the raised bed:
Pruning of coniferous trees and thuja: “acidifies” the raised bed.
Fresh cut of willows, hazels, rose bushes: sprouts new and suddenly there’s a shrub growing in the raised bed
Seed-bearing perennial and vegetable residues: could germinate
Diseased plant parts: e.g. leaves with mildew or brown rot. Fungal spores infect freshly grown vegetables.
Root weeds and seed-bearing weeds: e.g. couch grass, field bindweed or seed-bearing nettles.
Heavily weeded lawn clippings
Oak leaves, nut leaves: contain growth-inhibiting substances
Needles of conifers: acidify the raised bed
Compost from public composting facilities: often contains pesticide residues, sometimes even heavy metals. Use only compost that is also approved for organic farming.
Animal manure from animals treated with hormones or antibiotics.
Garden soil with residues such as root weeds, weed seeds, snail eggs, etc.
You’ll also need this:
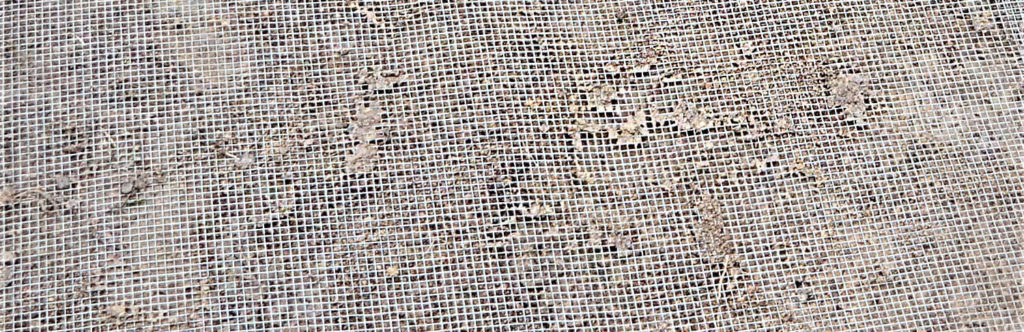
Vole grid
Shovel, pitchfork, bucket
Step by step to the finished filled raised bed
Step 1: Insert vole grid
Cozy, warm and a fully stocked pantry – who can resist? That’s exactly what voles think when they move into your raised bed. If you prefer to harvest your radishes yourself, start by putting a vole grid in your raised bed. This will keep the small rodents out from the start. Important: the vole grid must be very finely meshed, max. 6.5 x 6.5 mm – because the little mice slip through larger meshes.
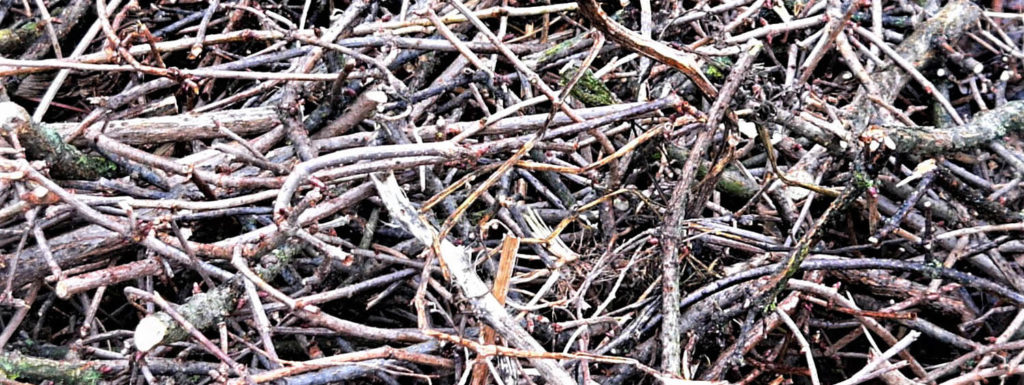
Step 2: Fill tree and shrub cuttings
Now it’s time to start filling. First, tree and shrub cuttings are placed in the raised bed. This can be whole tree trunk sections as well as larger branches and small cut twigs. A colorful mixture of everything is best – depending on what you find in your garden. Fill the raised bed to more than halfway full, as the many voids and the weight that follows will cause this layer to quickly collapse. If you don’t want to wait for that, get into the raised bed and kick the branches together.
Step 3: Grass or lawn clippings, weeds, perennial and vegetable debris as a second layer.
The shrub cuttings are followed by a layer of grass or lawn clippings, weeds, perennial and vegetable residues about 10 cm thick. Ideally, you have already collected the grass in the summer after mowing. Mix it with some old soil or compost to prevent mold. You can also mix the rest of the material into this layer depending on availability. Don’t have grass? Good alternatives are miscanthus mulch (elephant grass or Chinese reed) or straw.
Step 4: Compost for acceleration
On top of the grass is half-rotted compost, this layer is about 10-15 cm thick. The unfinished compost brings life to your raised bed. Compost worms, springtails, microorganisms, etc. are already “warmed up” and continue to feed in the raised bed. They move downwards (to the grass and branches) as well as to the following layers. In the process, they mix the filling material a little and break it down.
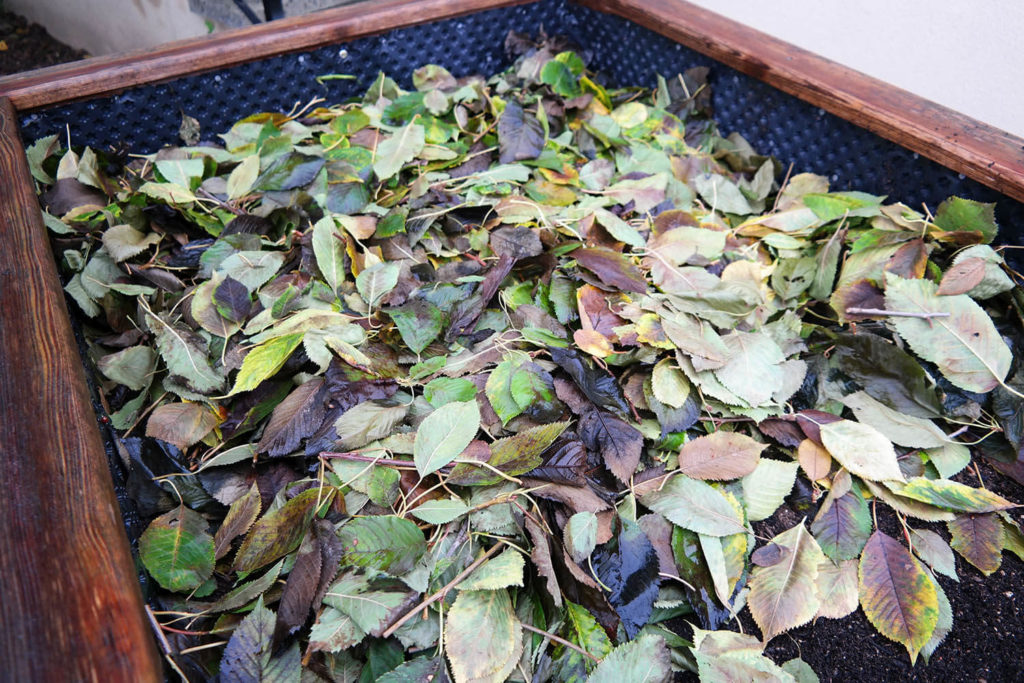
Step 5: Foliage – not only as a warm blanket
Pack a thick layer of leaves (about 15-20 cm) on the compost. The foliage warms the soil animals and at the same time provides them with food. Also mix some soil or finished compost under the leaves , then it works better with the rotting and you prevent mold.
Step 6: Animal dung – “nice to have”, but not a “must have”.
Fresh animal manure brings real power to the raised bed. It heats it up strongly and releases lots of nutrients. Next spring, tomatoes, zucchini, cucumbers and peppers will grow through the ceiling. Still, fresh animal manure isn’t all benefits: Plants with lower nutrient needs, such as lettuce, spinach or radishes will find it too “hot.” Due to the excess of nutrients, they germinate worse and the young seedlings die. In addition, they take up too many nitrates, which accumulate in leaves of lettuce and spinach as well as in the heads of cabbage, kohlrabi and cabbage. Therefore, use animal manure only very selectively – if you are sure that you want to plant only high-yielding plants in the spring.
Step 7: half rotted compost and mature compost
Instead of animal manure, you can add half-rotted compost to the leaves. It is much less “sharp” than the animal manure, but – in a slightly milder form – has the same positive properties: it warms the raised bed and releases nutrients.
Finally, over the animal manure or semi-finished compost comes a layer of mature compost, a total of another 10-15 cm of material came into the raised bed.
After this shift, you get to take a well-deserved winter break.
Step 8: once again leaves, grass and compost
Continue in the fading winter or early spring (February-March). The filling is neatly slumped over the winter. Fill the bed again with a good mixture of leaves, grass clippings and compost – to about 10-15 cm below the edge.
Step 9: Organic soil best bought
Now is the time, as the very last layer comes organic soil or humus soil in the raised bed. It is best to buy it, because with garden soil you could get problems into the raised bed, which you wanted to escape. So weed seeds, root weeds and snail eggs.
This makes the filling in your raised bed
Properly layered material has a great effect on your raised bed harvest success.
Between the branches and twigs are a lot of cavities, which provide enough air in the raised bed. The soil animals can breathe better and digest more. The mixture of grass, leaves, and compost at various stages of maturity above warms the raised bed and releases nutrients. Plants are allowed into the raised bed 2 weeks earlier in the spring, as the warmth makes them germinate more easily. The many nutrients ensure rapid and lush growth – nothing stands in the way of a great harvest.
The right raised bed filling offers some extra bonuses: no waterlogging, hardly any trouble with weeds and snails have to stay outside.